Столик в стиле ар нуво
Снова с целой пачкой апдейтов:)
Начну с последнего, столик ар нуво из махагона:
 |
| From Little Boxes |
Сделала разную мелочевку, типа персиков, выточила для них тарелочку, появилась выпечка.
И много всего…
Столик.
А зеркало ведь так и не готово. Так что все еще одна рама, я ее чуток состарила. И сделался столик.

Это один из немногих случаев, когда чертеж не делала сама, а использовала рисунки из Scale Cabinetmaker. За что и поплатилась:) Обнаружилось много косяков и много непонятных мне вещей. Например, боковые планки – резные, правда резьбу еле видно на фотографии, ну да ладно. Резьбу я делала по шпону толщиной 0.6 мм (!), то есть 1/32 дюйма примерно. Зачем автору надо было такой геморрой придумывать, я не знаю. Но таки я это сделала. Ножки тоже резные, теперь неприлично сверкают позолотой:) Теперь мне кажется, что после этого столика я могу сделать что угодно.;) Осталось это неприличие покрыть шеллаком, и с мебелью вроде все в этом румбоксе. Впереди финальная стадия.
Почти готово.
Ух, я сюда уже так долго не писала, что не знаю с чего начать.
Лучше покажу почти законченный румбокс:
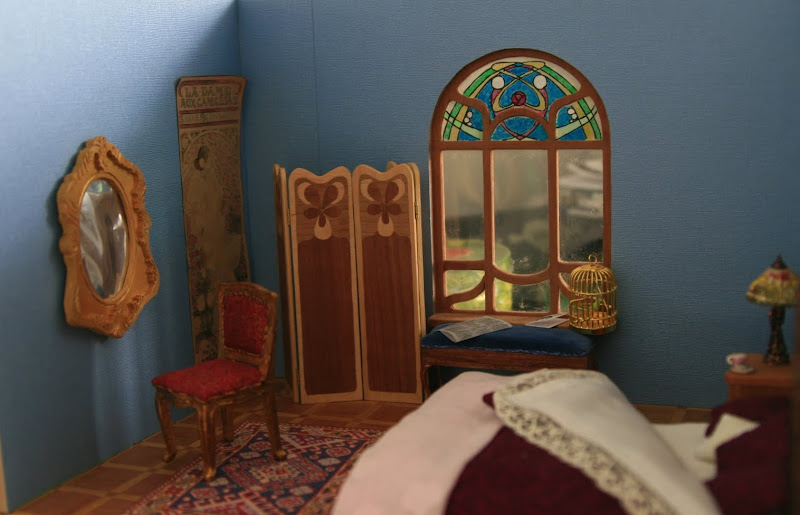
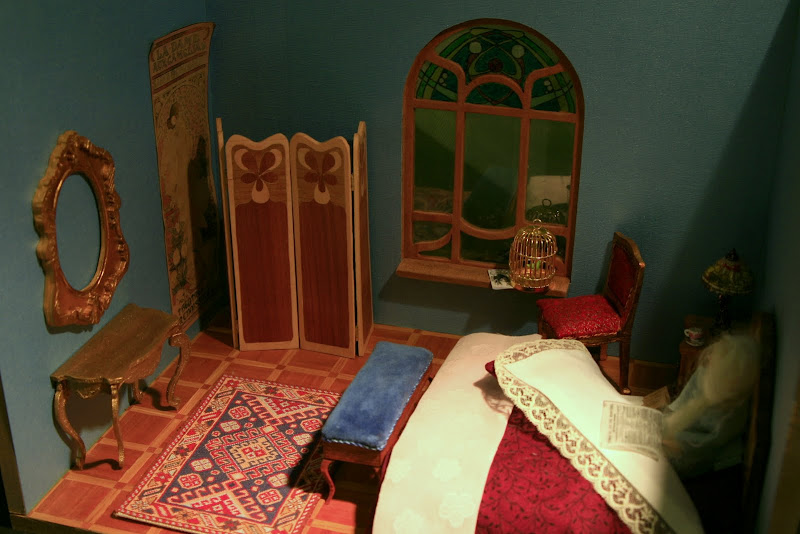
Window – playing around
thought I would never post the parts I was just playing with, but never say never.
Last two days I was trying to find a design for the window, I looked through several books in Russian concerning modern style and also several Flickr groups. Result – hundreds of photos saved, basic concept was chosen.
The walls in my roombox are 1cm thick, so I decided to use walnut, just because it perfectly matched my pattern. It was 2,5mm thick, and I made some mistakes: first of all, I glued the pattern against the grain (hope it’s the right term), and secondly, the walnut I was using was too fragile, and IMO was overdried.So the window was “broken” – it just fell apart. Why, why did I do all this? I have no idea, I knew it wouldn’t work. Besides, I don’t have experience working with walnut, maybe you know – is it the material I’m using or is it about walnut itself? Instead of trying to fix it I decided to use mahogany – I worked with it when I was building the table, so I knew what to expect. And, no surprise, it was okay. I’ve managed to cut the whole window, this time the pattern was along the grain (hope that was my main mistake).

I’m not going to use this frame – now that I know that mahogany is my choice, I’ll start all over and cut the details separately, after that assemble.I need two frames, so it’s a lot of work:)
As you can see, I’m making it in art nouveau style, I feel so nervous about it, this should be my first time experience, and I’m not sure about the result. Hope I’ll make it work.
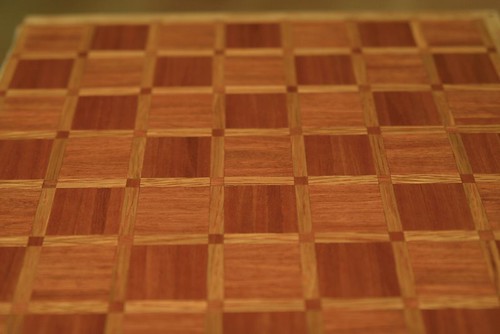
Parquetry – done
All done – I just need to cut the paper off on the left side:) I’m pretty happy with it, though it could be better. Moving on to windows.

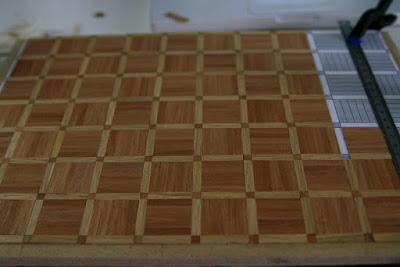
Parquetry
Hi everyone!
This weekend was looong, in Russia we had 4 day holidays, so I had a chance to start a new project. I can’t really go into details right now, but I hope I’ll show the whole thing pretty soon.
I finally managed to buy MDF, a bit hard to buy, all the shops that sell it don’t work during weekends and are outside Moscow, but I found one. So I bought 6mm and 10mm sheets (2m X 3m). I’m going to use them for roomboxes and maybe one more dollshouse.
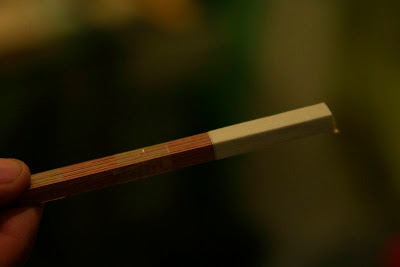
I started with the parquet – and that’s when I loved my table saw. It’s so easy to cut veneer with it! We’ve found a way to make some sort of jig to cut it evenly (if you’re interested I can show you the whole process). As a result, it was possible to cut such little pieces
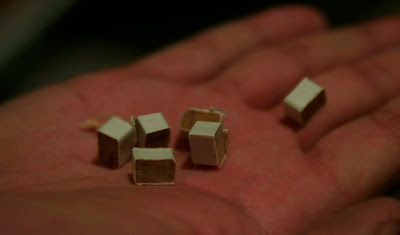
And these:
After that I started working on a parquet, it’s not sanded yet of course, not finished. At this point this is how it looks: