Window – playing around
thought I would never post the parts I was just playing with, but never say never.
Last two days I was trying to find a design for the window, I looked through several books in Russian concerning modern style and also several Flickr groups. Result – hundreds of photos saved, basic concept was chosen.
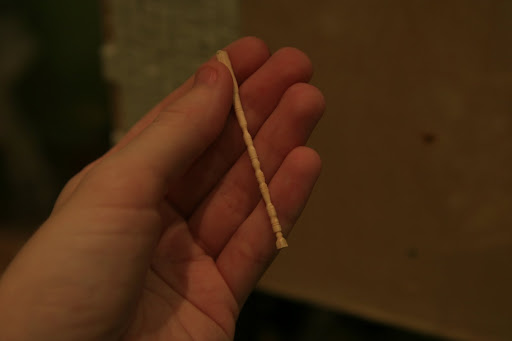
The walls in my roombox are 1cm thick, so I decided to use walnut, just because it perfectly matched my pattern. It was 2,5mm thick, and I made some mistakes: first of all, I glued the pattern against the grain (hope it’s the right term), and secondly, the walnut I was using was too fragile, and IMO was overdried.So the window was “broken” – it just fell apart. Why, why did I do all this? I have no idea, I knew it wouldn’t work. Besides, I don’t have experience working with walnut, maybe you know – is it the material I’m using or is it about walnut itself? Instead of trying to fix it I decided to use mahogany – I worked with it when I was building the table, so I knew what to expect. And, no surprise, it was okay. I’ve managed to cut the whole window, this time the pattern was along the grain (hope that was my main mistake).

I’m not going to use this frame – now that I know that mahogany is my choice, I’ll start all over and cut the details separately, after that assemble.I need two frames, so it’s a lot of work:)
As you can see, I’m making it in art nouveau style, I feel so nervous about it, this should be my first time experience, and I’m not sure about the result. Hope I’ll make it work.
Parquetry – done
All done – I just need to cut the paper off on the left side:) I’m pretty happy with it, though it could be better. Moving on to windows.

Parquetry
Hi everyone!
This weekend was looong, in Russia we had 4 day holidays, so I had a chance to start a new project. I can’t really go into details right now, but I hope I’ll show the whole thing pretty soon.
I finally managed to buy MDF, a bit hard to buy, all the shops that sell it don’t work during weekends and are outside Moscow, but I found one. So I bought 6mm and 10mm sheets (2m X 3m). I’m going to use them for roomboxes and maybe one more dollshouse.
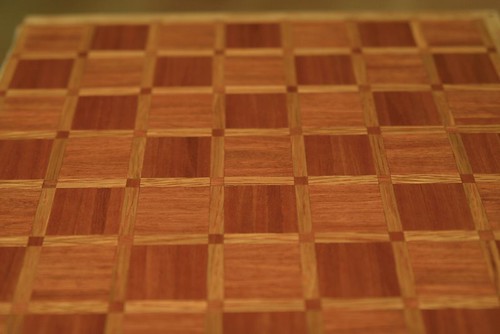
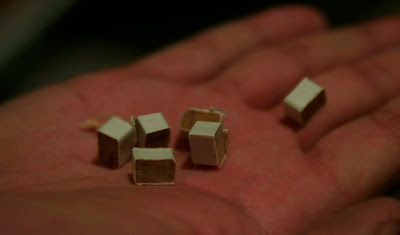
I started with the parquet – and that’s when I loved my table saw. It’s so easy to cut veneer with it! We’ve found a way to make some sort of jig to cut it evenly (if you’re interested I can show you the whole process). As a result, it was possible to cut such little pieces
And these:
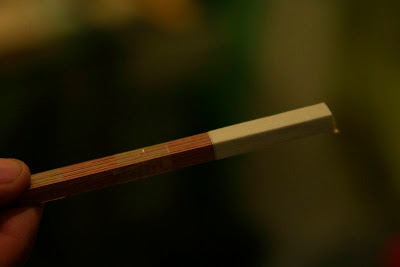
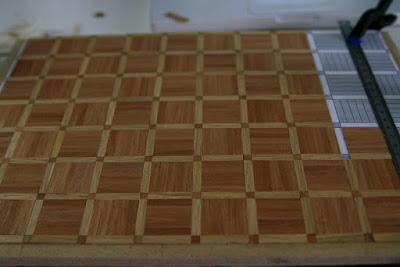
After that I started working on a parquet, it’s not sanded yet of course, not finished. At this point this is how it looks:

Kitchen stool
The final semester is over, and I’m free till April! This means that I can get back to my dollshouse:) That’s a huge relief for me – last month was absolutely crazy ( I guess, this was my favorite word this year), I had no time at all. I hope that I’ll be posting lots of updates now.
This week started with the idea of making some furniture – I had a kitchen table made several months ago and its style doesn’t allow me to use it in the dollshouse, so why not making a roombox? I guess I’ll make it a kitchen. So I thought it would be nice to make couple of kitchen stools first.
Legs are almost done:

First Blanket
When it’s quiet at home, when you’re tired of everything and just want to spend sometime alone.
Enough of words, I love embroidery! In my doll’s house there should be a lot of it – blankets, towels, tablecloths, curtains.
I started with blankets for the bedroom on the second floor, I think I’ll finish it in couple days. I got through some antique Russian ornaments of 18th century and here’s the part of what I’ve done:


The ornament is easy, also I’m not sure if it would be on the bed or somewhere in the chests:)
![Reblog this post [with Zemanta]](http://img.zemanta.com/reblog_e.png?x-id=6bfe542a-32d0-4a07-b237-d1c79e9437d4)
First floor
The first floor is finished.


Yay! Next on my list – the balcony and the roof.
Балясины. Снова.
Sorry for not posting anything new lately, I’m quite busy with my graduation work, though it’s second, it’s still lot of things to do.
We’ve finished the parquetry, I’m not going to use it in my doll’s house, it’s just for fun. Now it’s sandpapered and covered with beeswax.
I also finished making the balusters for the balcony, well I need to make two, that will be a bit bigger, so the whole picture would be something like this:
As you can see, the first and the last balusters are bigger, which makes the whole composition very nice.
For now, nine balusters are ready.
I really enjoy working on mini lathe, it takes time to learn but the result is worth it, besides I like the process too:)
Parquetry in Miniature
We became huge fans of miniature parquetry!:) Several patterns are made, some amazing pictures downloaded.
Starting from the easiest one:
It’s 15cm x 15cm. White oak.
Slow Progress
Hope I’ll have some good balusters for the balcony one day.
Just for fun
Experimenting with my lathe: