New Old Book
This book has been in my wish-list for quite a long time. I didn’t see any good reviews of it, you know, I’m too curious, always wanted to know what was inside. “Making Miniature Furniture” is out of print, I saw it on Amazon available from different buyers (mostly US), but later found it on biblio.com. The book was available from UK, so I decided to give it a try.
This particular copy is 1997 edition, originally printed in 1988. It’s had a bit different approach than of Harry W. Smith, though I quite liked it. No metalworking chapters, only wood. Lots and lots about instruments, principles of work. There are no furniture projects like Victorian table or something like that, but mainly general – building frames and doors, drawers.
I liked these small references on different styles, nothing new, but still interesting.
Color illustrations are great too, just loved marquetry work here:
Too many details on this photo 🙂
Carving legs
I finished carving these legs last week. I’m almost pleased with result, I was even thinking of making another version of them but I have other projects to do too, so I decided on moving on. I really liked working with cherry, though with pear wood it would be absolutely different experience. The only problem I had is, when I was finishing working with spheres, some of those small claws started to split and fall off so I had to glue them back. But I liked how the joints and claws turned out.
Carving spheres was fun, they look just right from every angle.
The other details above the leg were supposed to be carved by Dremel, but I didn’t like the result at all, simple V-shape micro chisel 0,5 mm was the best option.
I also bought a set of Narex chisels lately. They are quite good for their price, but require additional work. Kirschen is still my number one choice.
I also started working on drawers, two of them were shaped according to the profile of the sides. The most difficult part here is done.
Bombe Chest
I decided to try one more project from Harry W. Smith’s book that I really like.
This chest is made of mahogany in the book, but I really wanted to try cherry for this one. The most interesting part was to make curved sides. Usually I follow all the tips from this book, but this time I was a bit confused. I didn’t like the way of shaping these parts – with a small drum sander held in a flexible-shaft machine. I tried it and found the results inconsistent. Working with a bandsaw was absolutely different experience, very easy and precise. The original thickness of a stock was 8 mm and I shaped it to 2 mm.

Then I cut dovetails for the dividers and glides. All fitted nicely.
The back was also easy to make. Then I needed to carve four claw foots. Something like this:

I’ve seen several how-to videos about carving them, I highly recommend those from Popular Woodworking. Though they all are really helpful, especially their references on different shapes and forms. I’ve been working on them for the last week or so, not really happy with the result but I’m close to the OK version 🙂 Hope to show you them soon.
Drawers
The desk is not done yet!:)
My hubby developed a habit joking around if I have made my desk yet. Last few days I’ve been working on the drawers. First I’ve made strips then cut mortises for the bottom of the drawer. It would be easier if the drawers had the same height, but the lower half drawers have different one.
Compartments
On Wednesday I finished this central piece. The height of it is 17 mm and the width is 48 mm. I used my own mahogany veneer 0,8 mm. I was almost done with the drawers on the left and on the right of this letters compartment but decided no to use it and try to make another one.
New Table
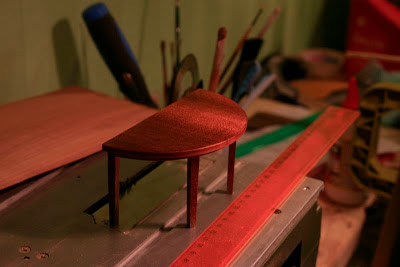
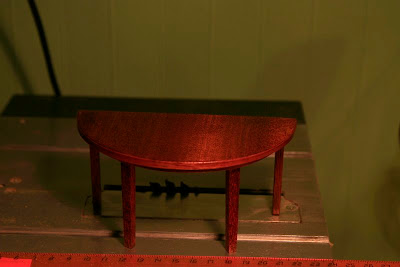
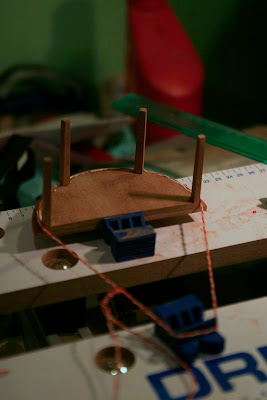
New table – I didn’t make it!:) My hubby did this table tonight. That’s how beer affects people:) After a pint of beer he decided to make himself busy. The result is below:
 |
| From Little Boxes |
 |
| From Little Boxes |
 |
| From Little Boxes |
To glue the veneer to the table the wire from Cat5 cable was used. I think it’s a brilliant idea.
New Table
Here’s the new table that was made this weekend.
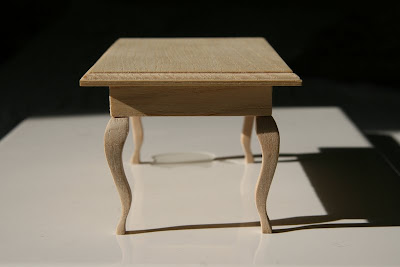
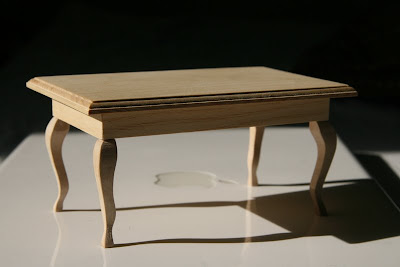
Well, actually I’ve never tried to make cabriole legs before, so it was very exciting experience. The table on the photos is not really sanded and finished. I’ll show you it later.I think it looks very good, considering the fact it was the first time experience with the new jigsaw.
And again, I’m not going to use it in the roombox I’m making. Just for fun!
Window frames
It was a day of window frames. Glueing, sandpapering, but still I’ve managed to finish only half. The rest is awaiting!:)
To make it more fun I browse through Ads and signs that were made before revolution. Can’t choose the most beautiful, they all are.
 Русский
  English
